DIY AV Equipment rack

NBPK402

Moderator
VIP Supporter
Thread Starter
Joined
Apr 17, 2017
Posts
1,866
Location
San Miguel de Allende Mexico
I just completed the spaceframe part of my new AV rack. The rack will ultimately extend longer than the metal frame to make it about 12" wider to hold my NAS. The space frame is 13" deep x 25" high x 73" wide (85" will be the width including the NAS inside of the ultimate size of the cabinet). The frame is made of 8020 1x1s, 1x1/2", and 3 1/2" long 1/2" aluminum round bars tapped for 1/4" on one end for attaching to the t-slots.

My dilemmas are...
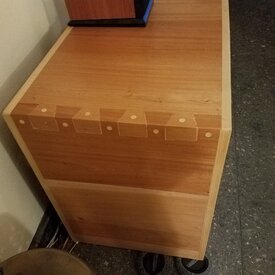
1: What to use for the shelves as the supports will be 3 1/2" long threaded 1/2" aluminum rods which will support the shelves by about 1 to 2" at 4 points. The support rods are 12" apart front to rear. I am thinking of shelves about 18" square which would be about 1" from the 1x1 uprights. I was thinking of 18x18 floor tiles...possibly slate, or glass.

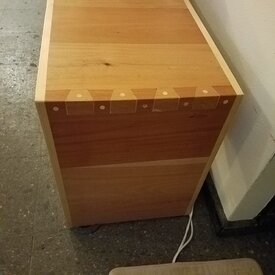
2: Should I use my old 1 1/2" thick wood shelves, and have them glued together to make the sides of the cabinet, and the top...or should I use granite for the top, and the wood for the sides? I am thinking the wood could be stained cherry to match my speakers.
received_1397224970429202.jpeg
 
This was very easy... I just bought the 8020 on EBay already cut to the length I wanted. The expensive part is all the angles, and the nuts. I picked up the angle pieces from China for pretty cheap, but I needed almost 60 angle brackets to make it very solid. What I like about this frame is you can adjust the shelves to exactly the spacing you want. I have seen others make the shelf brackets out of angled aluminum from 2080, but I wanted to make something different so I bought some 1/2" aluminum rod, and had a friend cut to length, drill, and tap each one. Other than that it was just screw together everything. Now I just need to make or purchase the correct size shelves, and outer covering. I could leave it all exposed, but I want it enclosed on the sides, and top, as I am planning on installing some doors with ventilation.
 
Last edited:
Here is the way it looks so far. I have 9 old shelves from the rack I built last year that are being repurposed for the new design. The wood will extend past the rack about 10" on the top so I can include my NAS on the end opposite of the small section for my media players. The shelves will be cut down joined, sanded, and refinished by my carpenter. The wood will also be used for sides for the rack. The Carpenter is booked till next month so it will be sitting like this for about another month.
20190907_175630.jpg
 
Nice metal work!
 
Yeah, easy to make. That's what people usually say when they know how to do it lol. It came out pretty good. I need something similar, but I want it to bolt it on to the wall so the little one won't into my stuff.
 
Yeah, easy to make. That's what people usually say when they know how to do it lol. It came out pretty good. I need something similar, but I want it to bolt it on to the wall so the little one won't into my stuff.
Seriously...You buy the pieces the length you want, and then just bolt it together with angle brackets. The only thing I had to do was cut the shelves. Now I did have a friend drill and tap the rods for shelf support, but that is because I wanted to do something different. You could just use angle brackets, and rest the shelves on them or screw them to it.
If you want to attach it to the wall you can use brackets or earthquake straps.

The maintenance guy at work it’s going to weld the gram for me since he’s got a welder at home. Then I’ll add the wood stuff later. It’s going to be similar to your buy enclosed in wood...possibly walnut plywood since hardwood is pretty expensive.
 
The maintenance guy at work it’s going to weld the gram for me since he’s got a welder at home. Then I’ll add the wood stuff later. It’s going to be similar to your buy enclosed in wood...possibly walnut plywood since hardwood is pretty expensive.
That is great! If you can...see if he can cut holes where the pipes connect, so you can fill with sand. By filling you can eliminate any ringing or resonances. zi designed some racks years ago, and a friend welded them, and powder coated them for me. I filled them with sand. They were great racks!
 
I get emails all the time for stuff in China. We've purchased 400 gun magnets from Hong Kong for $6 each (includes shipping)... they sell on Amazon for $20-30 in most cases... while we sell them for $12.99.

But I have seen a LOT of other stuff... big LED TV's... audio amps, tons of odds and ends... cheap cheap cheap, but you have to buy a few.

You seem to like buying from there... great deals... like the stand... and that DIY amp case is cool looking too. Good finds there.
Yeah I could not have a amp case built for what it cost me.
 
Just got a call from my carpenter...he said the customer he was starting on a project Monday said they have to delay 2 weeks! That meant he starts in mine on Monday. He came over to the house and measured my rack, and finalize the plans. We decided to go with a urethane finish on the cabinet with dovetail joints (I think it is a dovetail joint as it is with triangles). He also is going to trim out my shelves with real wood, and stain with Watco cherry stain. He said he will call me in about a week for me to see the joints, and determine the colors to use for the rack. We are thinking natural for the top, and maybe a contrasting color for the sides. For reinforcement we will be using flush mount screws in the inside of the channel of the aluminum to attach the wood, and keep it from shifting. He is also going to cut 2 shallow grooves in each shelf (on the bottom) so the shelves will rest more securely on the 1/2" aluminum rod brackets. The shelves will all have a real piece of wood on front edge, and 2 sides. I will post up pics when I get it done.
As far as my amp... I am waiting on the screws, and threaded nuts to arrive still.
 
I stopped by to see the progress, and it is close to being done now. He said it should be completed, and finished with polyurethane sometime this coming week. I can't wait to start putting the equipment in the rack!
I also installed washers, and it is much stronger now for the amps to rest on the pegs. I think I will still install the amps on the bottom as they will be resting on the shelves which are supported by 1" wide aluminum...this will guarantee no possibility of shelves tilting from the weight.

Pics coming soon.
 
I haven’t started building mine yet. I don’t have a table saw since mine I traded for some construction work. Now, I’m broke and can’t buy another one since the wife said we don’t have $$$ for a table saw.
 
I haven’t started building mine yet. I don’t have a table saw since mine I traded for some construction work. Now, I’m broke and can’t buy another one since the wife said we don’t have $$$ for a table saw.
You could always have your wood cut for you when you buy it...depending on how elaborate your design is.
 
Rack is done... I just need to get 2 special nuts for the 8020, so I can install 1 more shelf. It appears using washers solved the problem of them aiming downward. the cabinet is solid mahagony, and the shelves are mahagony veneered MDF with a African hard wood trim.
20191024_194059.jpg
20191024_194059.jpg
 

Attachments

  • 20191024_194120.jpg
    20191024_194120.jpg
    322.1 KB · Views: 58
  • 20191024_194108.jpg
    20191024_194108.jpg
    295.1 KB · Views: 52
That is very nice work... well done! :T
 
We were originally going to make the trim black, but since the joints had a pine color, and the Mahogany had some pine look too... I decided to leave it with a pine trim. I wish I would have had more of the African hardwood for the trim. This was our first time with this carpenter who was one of our old carpenter's sons. He is much better, and quicker than his father, so we will use him or his brother now.
 
Back
Top