Wayne A. Pflughaupt
Moderator
More
- Preamp, Processor or Receiver
- Yamaha CX-A5000 A/V Preamp / Processor
- Main Amp
- Yamaha RX-Z9 AV Receiver (as multichannel amp)
- Universal / Blu-ray / CD Player
- Denon DCT-3313 UDCI Universal Disc Player
- Streaming Equipment
- Roku Express
- Front Speakers
- Canton Karat 920
- Front Wide Speakers
- Realistic Minimus 7 (front EFX speakers)
- Center Channel Speaker
- Canton Karat 920
- Surround Speakers
- Canton Plus D
- Surround Back Speakers
- Yamaha YDP2006 Digital Parametric EQ (front mains)
- Front Height Speakers
- Yamaha YDP2006 Digital Parametric EQ (surrounds)
- Rear Height Speakers
- Yamaha YDP2006 Digital Parametric EQ (sub)
- Subwoofers
- Hsu ULS-15 MKII
- Other Speakers
- Adcom ACE-515 (for power management)
- Screen
- Pioneer PDP-6010FD 60" Plasma TV
- Video Display Device
- Yamaha DT-2 (digital clock display)
- Remote Control
- Stock Yamaha Remote
- Other Equipment
- Audio Control R130 Real Time Analyzer
When I picked up a used 60” Pioneer plasma TV a couple of months ago, the seller threw in an Energy 8” sub he didn’t need. Worked out well, as I was short a sub. The Paradigm sub we had in our bedroom system had been temporarily promoted to our living room system until we can hopefully get a Monolith sub later this year, so the Energy took its place in the bedroom system.

Well, low and behold, the little sucker up and quit working a week or so ago. I really didn’t want to waste any money replacing a temporary sub, so, I decided to “passive-ize” it. I had everything I needed on hand – banana binding posts I could install in the amplifier panel, and a spare Carvin amp with one channel dead that I had retired from my bass guitar rack. (Every Carvin amp I’ve ever owned blew the “A” channel with light-duty usage. Maybe that’s one reason they’ve gone out of business.)


The biggest pain was taking out the eighteen metric socket-head screws (8 for the speaker, 10 (!) for the amp panel). It took more time to get the screws in and out than it did to do the actual internal modification!
The driver showed 5 ohms on my VOM, which verified that it was good. It certainly looks beefy, but it has a plastic frame. That’s probably sufficient for an 8” speaker, though…

Once I got the amp panel out, I could see this was going to be an easy fix. All I did was cut the speaker-level input wires at the amplifier board, and spliced them into the two wires that connect from the board to the speaker. Thus, either speaker-level input is now a direct connection to the original driver. Didn’t even need to install a binding post!


Voila, we now have a passive subwoofer! Dropped the little amp into my bedroom rack, rated for 75 watts RMS, and we’re in business again. (The Energy specs say its amp was rated for 60 watts RMS).


I used to think that speaker-level inputs on a sub were cheesy. I’ll never think that way again! They’re quite handy if you ever find the need to “passive-ize” a dead active sub.
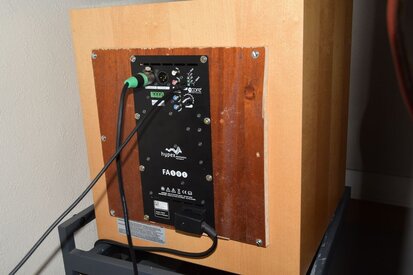
Here’s the little dude hard at work.

Regards,
Wayne
Well, low and behold, the little sucker up and quit working a week or so ago. I really didn’t want to waste any money replacing a temporary sub, so, I decided to “passive-ize” it. I had everything I needed on hand – banana binding posts I could install in the amplifier panel, and a spare Carvin amp with one channel dead that I had retired from my bass guitar rack. (Every Carvin amp I’ve ever owned blew the “A” channel with light-duty usage. Maybe that’s one reason they’ve gone out of business.)
The biggest pain was taking out the eighteen metric socket-head screws (8 for the speaker, 10 (!) for the amp panel). It took more time to get the screws in and out than it did to do the actual internal modification!
The driver showed 5 ohms on my VOM, which verified that it was good. It certainly looks beefy, but it has a plastic frame. That’s probably sufficient for an 8” speaker, though…
Once I got the amp panel out, I could see this was going to be an easy fix. All I did was cut the speaker-level input wires at the amplifier board, and spliced them into the two wires that connect from the board to the speaker. Thus, either speaker-level input is now a direct connection to the original driver. Didn’t even need to install a binding post!
Voila, we now have a passive subwoofer! Dropped the little amp into my bedroom rack, rated for 75 watts RMS, and we’re in business again. (The Energy specs say its amp was rated for 60 watts RMS).
I used to think that speaker-level inputs on a sub were cheesy. I’ll never think that way again! They’re quite handy if you ever find the need to “passive-ize” a dead active sub.
Here’s the little dude hard at work.
Regards,
Wayne


