Web Soil Survey Instructions for Use with Rachio Created by a Rachio User and provded on the Rachio Community Forum
INSTRUCTIONS FOR SETTING YOUR SOIL PARAMETERS
1. Go to the USDA Web Soil Survey Site, and select ‘Start WSS’
http://websoilsurvey.sc.egov.usda.gov/
Defining your ‘Area of Interest’ (AOI)
2. On the next screen type in your address on the left side of the page. For this example the White House was used.
3. Hit the ‘AOI’ button
4. Draw a rectangle around your property.
Finding your ‘Available Water Capacity’ (AWC)
5. Select the ‘Soil Data Explorer’ Tab.
6. Select ‘Soil Properties and Qualities’
7. Select ‘Soil Physical Properties’
8. Select ‘Available Water Capacity’
9. In the ‘Available Water Capacity’ section, choose ‘Weighted Average’, and then define the depth of soil that you want analyzed. You might start by using a depth that is at least the estimated depth of your deepest roots. You can try different values here to see how consistent your soil is.
If shallower depths reflect a vastly different value, you might use your judgement on the depth to use for your final number. Select ‘View Rating’ when you’ve entered the data.
10. The map is now super-imposed with a color coded overly that represent different soil types. In this case there is only one that has the color coding. Most areas will have several. Also note that there is a letter key labeling each region. In this case you see ‘BeB’ and ‘U1’. U1 doesn’t have an AWC number so let’s concentrate on the ‘BeB’ section.
11. Look for a table underneath the map. Find the row for ‘BeB’. In this case it’s ‘Beltsville-Urban land complex’. The ‘Rating’ column shows 0.15, so the White House north lawn soil has a 0.15 available water capacity.
Don’t worry about the rating of ‘centimeters per centimeter’. Converting the units to ‘inch per inch’ that Rachio software uses yields the same 0.15 number. It just means that for every inch of soil, there is 0.15 inches of stored water available to your vegetation. Remember this ‘Available Water’ number of 0.15 inch/inch. You’ll be entering it into your Rachio settings later.
Finding your Soil Type
12. When you go to put in your soil information into the Rachio software, you’ll need to start with a setting for the soil type. The soil type defines the ‘infiltration rate’ of the soil, or the speed at which water enters the soil. If you apply water faster than this rate, you’ll start to get water runoff, since the soil can’t accept the water as fast as you’re applying it. The Rachio is smart enough to figure this out if you have the ‘Smart Cycle’ feature enabled, in which case it will pause watering to give the soil enough time to accept what has been given so far. Take a look at
this article if you’d like to find out more about the feature and how it works.
Go back to the top of your screen and select ‘Soil Map’.
13. You’ll see the same ‘BeB’ key for your area of interest. Select the ‘Map Unit Name’ for your area. In this case, we select where it says ‘Beltsville-Urban land comples, 0 to 8 percent slopes’.
14. Once you select the soil associated with the area that you’re analyzing, you’ll see a description of the soil type. In this case, the ‘BeB’ section is silt loam down to 40 inches.
15. You’re done with the Web Soil Survey data gathering. You have ‘silt loam’, with an ‘Available Water’ of 0.15.
Entering Your Soil Information into the Rachio App
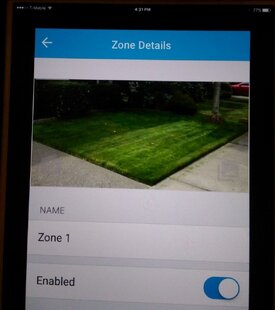
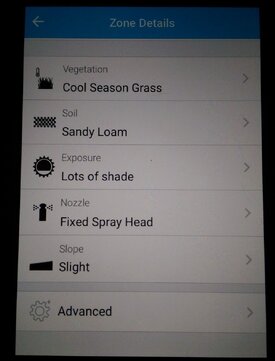
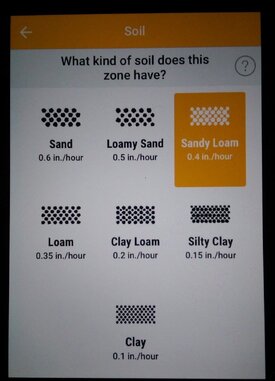
16. In your Rachio app go to the zone that you are setting up. Select the ‘Soil’ option. You’ll see several choices. There is not a choice of ‘silt loam’, so you’ll have to pick something close. Take a look at this Rachio article. You’ll see that ‘silt loam’ is somewhere nearest to ‘sandy loam’ and ‘loam’.
If you pick ‘sandy loam’, you will be less likely to engage ‘Smart Cycle’ since the infiltration rate is lower at 0.40 in/hr. If you pick ‘loam’ you’ll be a bit more likely to pause in the middle of a watering event since its infiltration rate is assumed to be 0.35 in/hr. Assuming you take the next step of setting your ‘available water’ in the advanced settings, there should be no other difference to selecting either of the two.
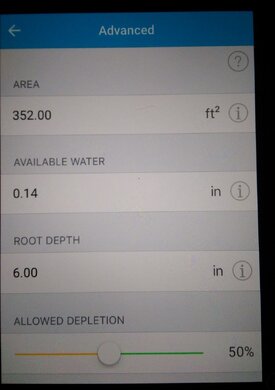
17. Now select the ‘Advanced’ button in the lower section of the ‘Zone Details’ screen.
18. On the next screen, type in the ‘Available Water’ number you found from the Web Soil Survey.
19. You’re done with your soil settings! You can choose to type in an ‘Area’ number that closer suits your zone, but it isn’t necessary for setting up accurate schedules. The ‘Area’ number is only used to estimate water usage, so the more accurate it is the better the reported statistics will be in the app. for water usage. It will not, however, affect your watering schedules in any way.
What should I do next ?
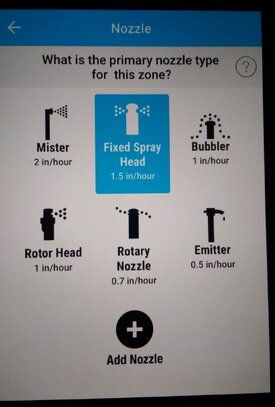
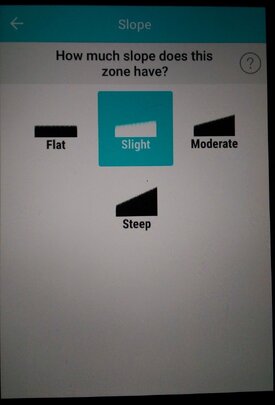
20. From here, proceed to check all of your other zone settings. The next greatest influence on watering time will be ensuring that you have the right nozzle setting. The nozzle setting tells the software the rate at which your zone’s irrigation system is applying water, so it’s directly correlated to the amount of time that the system determines that you need to water. Likewise, root depth is an important factor. To see how these and other factors relate to your watering duration and frequency check out the ‘Zone Attribute’ section of this article.


")